Thursday, September 13, 2012

Milk Paint Table Transformation

Hi Everyone!  Just wanted to share one of my recent finds while junking a couple weekends ago.  I went with my S.I.L. and a dear friend and I picked up this sweet little table up for next to nothing!  She is sturdy but light-weight and had such pretty detailed legs and scalloped front that I couldn't resist her.
Here she is in her original state, not bad but I knew she could be so much more!

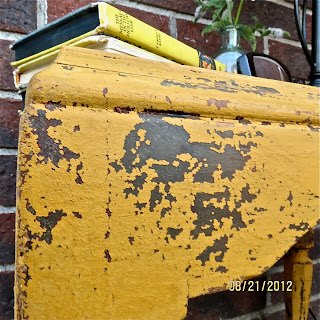
This was my first time using milk paint so I wasn't sure how she'd turn out. I used Old Fashion Milk Paint in Marigold Yellow.   I applied a coat of red paint first however on the front and sides to see if that would show through after she was distressed.  Then I applied 2 coats of milk paint and was amazed by the results.  I used a wire brush to achieve "maximum chippiness" to her legs and the front.

I was surprised that the red paint showed in some spots but not in others, it was very subtle and gave the piece some depth.  I finished my little sweetie with a generous portion of Annie Sloan Clear Wax to seal her with an extra coat on the table top for added protection.


<a href="http://pinterest.com/pin/create/button/?url=http%3A%2F%2Fjunksterchick.blogspot.com%2F2012%2F09%2Fmilk-paint-table-transformation.html&media=http%3A%2F%2F4.bp.blogspot.com%2F-YxoRaVbWijE%2FUErYRrkW3cI%2FAAAAAAAAATg%2F3JEodNqdRgQ%2Fs1600%2FIMG_4269.jpg&description=Milk%20Paint%20Table%20Transformation%20%40%20Junksterchick.blogspot.com" class="pin-it-button" count-layout="horizontal"><img border="0" src="//assets.pinterest.com/images/PinExt.png" title="Pin It" /></a>


Here she is complete!  I dressed her up for a night of fun reading, she is perfect for a nightstand or in a front entry way (which is where I'm putting her for now).  Notice the Nancy Drew book?  I picked up a couple vintage ones on the same day I found sweetie - there's nothing better than to snuggle up with a comfy blanket, a good read and a cup of tea.

I'd love to hear from you so please let me know what projects you've completed.

Im sharing this over at Miss Mustard Seed's FFF Party
Im sharing this over at Chic on a Shoestring Decorating's Flaunt It Friday


Be Blessed -

Friday, September 7, 2012

The Prayer Chair

I picked up this adorable little wooden chair a bit ago but I wanted to share my little creation.
It was in pretty decent shape when we found it and I could have just left it the way it was but I wanted to add something to the seat. 
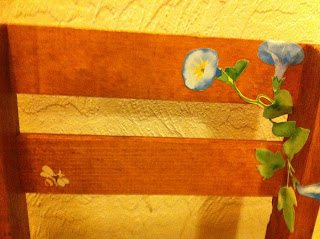
I thought of doing sheet music but decided to go with artwork from a "Little Golden Book" that I had about prayers.  Eloise Wilkin is the artist and I have loved her children illustrations for many years so I chose this page and cut out the outer rim of the flowers that bordered the prayer and illustration and Mod Podged it to the seat.
I love the detail and colors so I bent the overlapping paper to fit into the corners of the chair on the back frame and around the seat as opposed to cutting the art off.
When I got to adhering the leaves on the sides of the seat to frame the edge.  While this technique was labor intensive I really love the effect.  I finished off all the cutouts with 2 coats of Mod Podge to seal them.
While the prayer chair isn't very practical for every day use with kids, it turned out very sweet.  I gave the chair to our aunt as a birthday present.  She collects porcelain dolls and fell in love with the chair when she saw it.  I anticipated her setting one of her dolls on it but she said the chair was too pretty to be covered up... I have to agree with her. 
May you and your children be blessed this school year!

I'm sharing this with Miss Mustard Seed's Friday Furniture Link-up Party!